SVG.LA

AI Generate SVG

Turn a written idea into an editable vector graphic. Describe the subject, shapes and colors, then create and refine your SVG in Studio.

Text to SVGEditable vector pathsContinue in Studio
AI reference images must be at most 7.5 MB and 8000 pixels on each side.

A reference image is optional. AI can generate editable SVG from text alone or use the uploaded image as a reference.

AI Generate SVG
A reference image is optional. AI can generate editable SVG from text alone or use the uploaded image as a reference.
Try an idea

Generation requires an account and credits. Review the cost in Studio before starting.

AI Generate SVG: from a brief to vector examples

These illustrative SVG studies show how subject, shape and palette can guide a prompt. Use the briefs as references for your own Studio experiments.

Vector example
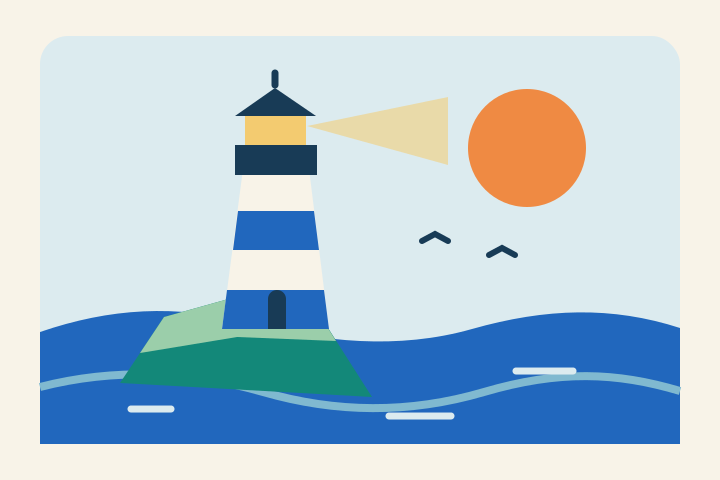
Flat vector illustration of a cream and blue coastal lighthouse, teal cliffs and an orange sun

A coastal scene built from simple shapes

A lighthouse, cliffs and a warm sun give the brief a clear focal point. A limited palette keeps the scene easy to read at smaller sizes.

A coastal lighthouse on teal cliffs, cream and blue building, orange sun, flat geometric vector illustration, limited palette, no lettering.

Overview

What is AI Generate SVG?

AI Generate SVG turns a text description into SVG artwork. Instead of starting with a raster image, you describe the design and receive vector shapes you can inspect, edit and reuse.

Start with words

Describe an object, layout, palette and style. Clear instructions help keep the generated design focused.

Work with vector paths

The result is SVG geometry that can scale for different layouts and be edited after generation.

Keep refining in Studio

Review the preview, adjust the design and export the result from the same workspace.

A text to SVG workflow you can refine

Use AI to build a first version, then keep control of the final artwork.

Guide the visual style

Ask for flat shapes, geometric forms, line art or a limited palette in your prompt.

Create scalable graphics

Reuse SVG artwork in interfaces, presentations and web layouts at different display sizes.

Edit the result

Fine-tune paths, colors and proportions in Studio instead of treating the first generation as the final design.

Practical projects for AI Generate SVG

Focused, simple graphics are a useful starting point for text to SVG.

Product and interface icons

Explore a clear symbol for a feature, category or action, then adjust it to match your interface.

Logo concepts and badges

Try graphic directions for a project or event. Review lettering, alignment and originality before using a final mark.

Website illustrations

Create simple spot illustrations and decorative graphics that fit your page palette.

How to use AI Generate SVG

Move from a written brief to a downloadable SVG in three steps.

Write a specific prompt

Name the subject, composition, colors and style. A short, focused brief is easier to refine than a crowded scene.

Generate in Studio

Open your prompt in Studio, sign in and review the credit cost before starting the generation.

Review, edit and download

Check the preview and paths, adjust details as needed, then download the SVG for your project.

Write a useful brief for AI Generate SVG

A focused prompt and a careful review make the first draft easier to turn into a graphic you can use.

Describe one visual job

Begin with what the graphic needs to communicate and where it will appear. A navigation icon needs a recognizable silhouette at a small size; a website illustration can carry more detail. Name one main subject, its placement and the space around it. Avoid asking for several competing scenes in the same brief. For small interface symbols, the AI SVG Icon Generator helps focus the brief on a single readable icon.

For example: “A centered lighthouse icon with a broad base, one window and two light beams; dark navy and warm yellow; flat geometric shapes; no text.” This gives the model concrete choices to follow, and gives you a checklist for reviewing the result.

Choose colors and detail deliberately

Specify a few colors that belong together, then describe how they should be used: one main fill, an accent and a contrasting outline, for example. If your page uses a dark background, say so in the prompt and check whether the generated edges remain visible against it.

For compact icons, request fewer internal lines and larger gaps between shapes. For a larger illustration, allow secondary elements that support the subject. Small textures, tiny lettering and dense decoration can make the SVG harder to read without improving its message.

Vector example
Vector illustration of a green sprout on a blue planet with an orange orbit

An abstract idea with a recognizable subject

A sprout on a small planet combines nature and space in one composition. The orbit adds movement without filling the illustration with fine detail.

A green sprout growing on a blue planet, orange orbital ring, simple rounded shapes, flat vector illustration, no lettering.

Refine one decision at a time

Review the overall silhouette before judging small details. Ask whether a viewer can recognize the subject without reading your original prompt. Then check balance, spacing and the relationship between foreground and background shapes.

When the first draft misses the goal, identify the specific issue before revising your instructions: a wider base, fewer windows or a simpler outline is more actionable than “make it better.” Keep the successful parts of your brief consistent so you can judge whether the next version resolves that issue.

Check the SVG where it will be used

Inspect both a larger preview and the actual display size. Look for clipped edges, awkward overlaps, uneven spacing and details that disappear when reduced. Check any lettering carefully, especially if it is part of a logo concept.

After refining the paths and colors, download the SVG and open it in your intended layout or design application. A clear Studio preview is a useful checkpoint; the final check is whether the graphic reads well alongside your real content. If a finished bitmap already contains the design you need, Image to SVG starts from that reference rather than a new text brief.

Frequently asked questions

AI Generate SVG FAQ

Practical answers about text prompts, SVG output and the Studio workflow.

How does AI Generate SVG work?

You describe a graphic in words, and Studio uses AI to generate SVG shapes and paths. You can review the preview and continue editing the result.

What should I include in my prompt?

Include the subject, intended layout, a small color palette and the visual style. For example: a green leaf icon, three simple shapes, clean edges and no text.

Can I start from an existing image?

Yes. Use the Image to SVG page to upload a PNG, JPEG, WebP or GIF image up to 10 MiB and continue the vectorization workflow in Studio.

Can I edit the generated SVG?

Yes. Studio lets you continue working with the vector paths and colors. Check the result at the size where you plan to use it before exporting.

Does AI Generate SVG require credits?

Generation requires an account and uses credits. Studio shows the applicable credit cost before you start; available credits depend on your account.

Will AI follow my prompt exactly?

Results vary with the prompt and design complexity. Simple shapes and clear instructions are easier to refine; precise lettering, symmetry and dense scenes may need manual adjustments.